We’ve Moved!!

I finally did it!!  I have made the move from WordPress.com to self-hosting.  I hope everyone will follow us at www.asantbandersonfamily.com.  I have many things schedule over the next week and I wouldn’t want anyone to miss it.

Now on to my next big change, I need a new look.  Do you design blog layouts or know someone who does?  Let me know so I can check out there work.  I have debated on designing it myself but I am really thinking about letting someone else do it so I can do more fun things.

Bringing Outdoors Indoors

Last week on S.Y.T.Y.C. we had an outdoor themes projects. Mine was “Bringing Outdoors Indoors”. I made a reversible table runner and placemats with embroidered ants on one side and an embroidered ladybug on the other side. I was excited to finally use this ladybug appliquéd but my kitchen has ladybug decorations in it. I choice the colors that I did for the table runner and placemats because it reminded me of a picnic quilt.

Bringing Outdoors Indoors

Bringing Outdoors Indoors

Adam helped me make the center piece for the table. I wanted some wood that looked really weathered and what better than the weather wood from our fence that got blown down a while back during a tornado. The wood was warped so it helped with the weathered look. Then I stained it with some ebony stain and the next day sanded it. I don’t completely love the flower vases I got to go in it. They are too short. So I need some taller vases for it. I have debated on stenciling “Anderson Est. 2011”, but I am not sure with the stain being so dark.

Bringing Outdoors Indoors

Don’t forget to head on over to S.Y.T.Y.C. and vote for your favorite around the world project!!

Making a Move & Lots of Changes

I have been thinking about it for about six months now and I have finally decided I am going to make the move from wordpress.com to self hosting with wordpress.org. It’s rather scary for me and I am a bit nervous about it. You see I have never made any money with my blog (I haven’t tried yet either) and I have this thing about investing money to earn money, it hasn’t ever worked out for me. But I do love to blog so even if I never make any money with blog I am excited about it being more professional. If anyone has any suggestions, words of advice, etc. please send them my way.

With the move I will probably end up with a new look. I have always had a hard time coming up with a look for my blog without paying for it that I like. I haven’t decided yet if I am going to invest in having someone design it for me or if I am going to do it myself. When Alyssa was a baby I use to do a lot of that type of stuff myself but now having four babies I don’t have enough time to do everything. I’ll probably start out with something I did and then down the road pay someone else to design it for me.

Another big thing is I am in the process of reopening my etsy shop. So be on the look out for a link to it. I haven’t decided everything I am going to offer to start with but I have a few things in mind. If you have seen anything I have made that you would like to see in it let me know.

Once I get several things set up how I want them I am going to order some business cards to match. Looking really professional then! 🙂 I am still in the running at S.Y.T.Y.C. and one prize for first place is admission to the SNAP Conference. Adam said if I win we will figure out what to do so I can go. It would be so much fun to get to go to a blogging conference, meet so many bloggers that I adore from afar and maybe even get a chance to grow my blog into something big.

If you have advise for me in this transition send it my way, otherwise be on the look out for my new site address and I hope everyone will follow us there!!!

Alyssa Turns 9

Don’t forget to head on over to S.Y.T.Y.C and vote for this weeks around the world projects then check back on Friday to see which one was mine!!

I know this is a few weeks late but better late than never right?!?  My oldest baby, Alyssa, turned 9 years old on the Jun 28th.  I can’t believe it has been 9 years since God blessed me with this beautiful baby girl.  Last year the kids decided instead of having big birthday parties that no one comes to that we would do something just us. Alyssa picked for her and I to have a girls day and we are going to sips and strokes but due to different things we haven’t been able to go yet. But she has been such a good sport about it and knows we will go in the next few weeks.

For Alyssa’s birthday she kinda knew what she was getting for a while.  I have been working on a desk for her room and I told her for her birthday I would fill it with craft supplies. She got lots of goodies!!

Alyssa Turns 9

Alyssa Turns 9

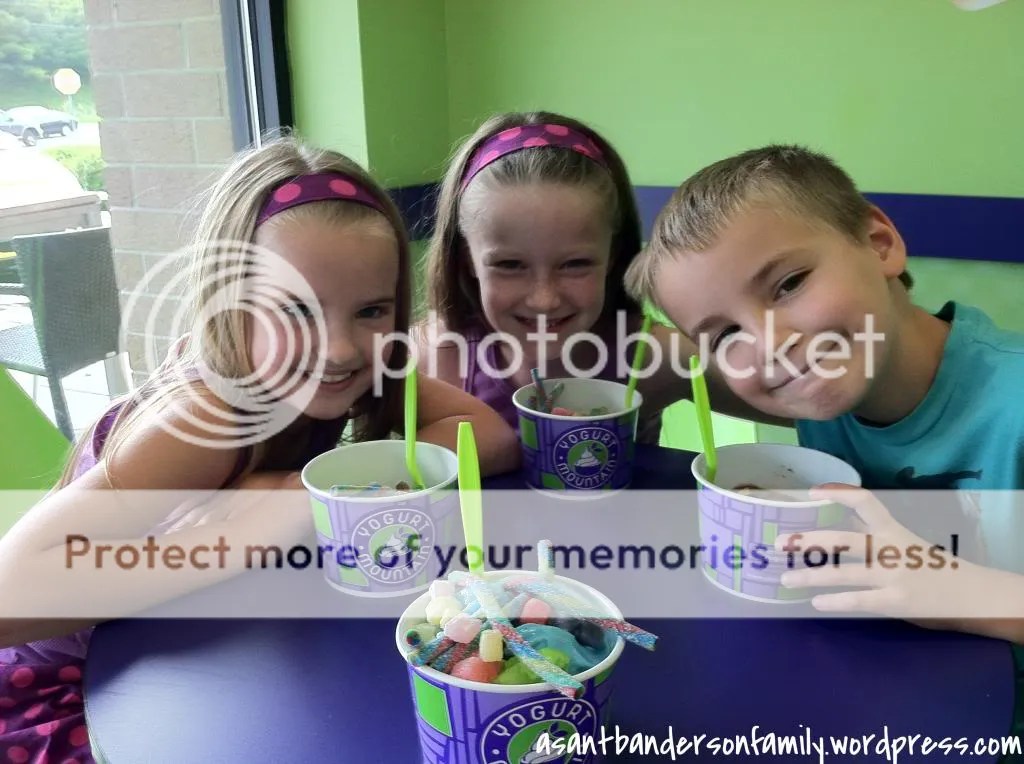
We had a fun day!!  She picked Chickfila for breakfast.  We had Yogurt Mountain for lunch.

Alyssa Turns 9

Then we had Gigi’s cupcakes with Auntie that evening. Alyssa picked out a special one for her and I got an assortment for the rest of us.  Happy 9th birthday Alyssa!!!

Alyssa Turns 9

Alyssa Turns 9

Alyssa Turns 9

Felt People

I know this is rather late, but with four kids in the middle of summer my life has been rather busy and time to blog had taken a back burner. Partly because it drives me crazy that some of my stuff is ASANTB and some of it is Sheena Creates. So I have debated on changing my blog and I have been thinking about going to self hosting but it so loses me. Anyway, that is all for another day.

Felt People

For my kids can do project on S.Y.T.Y.C., we made felt people. This was something that started in my head as stuffed animals and as I was thinking about my pattern decided people would be better. The kids and I went to Hobby Lobby and picked out felt and buttons for their people. I was hoping we would have had a chance for them to finish theirs before this post, but between traveling, Alyssa’s birthday, work stuff and the holiday we haven’t had a chance. But I am glad I made Bradley’s before I let them make theirs because I made changes to my plans along the way. After they make theirs I’ll do another post with a tutorial.

Felt People

Don’t forget to head on over to S.Y.T.Y.C. this week and vote for your favorite around the world project!!

Pocket Tees

Are you looking for pocket tees?  Make sure you check out Sheena Creates on Facebook.  I now have them available.  There is a limited number of them available at this time so make sure you get them before they are gone.

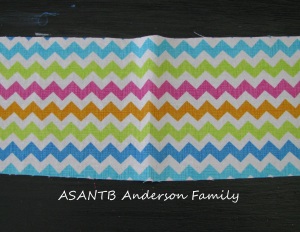
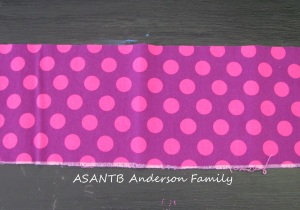
Currently I am selling them using the fabric from the post I did recently here and here.

Chevron Fabric Purple with Pink Polka Dot Fabric

Monogrammed Outfits Green, Pink, Orange & Blue Chevron

The next monogrammed outfits the girls and I wore was the green, pink, orange and blue chevron print.  It has a name but I can’t remember what its called.  I LOVE this fabric and so wish I had of bought more of it than I did.  Hopefully I’ll find some more of it.  Please excuse my lack of photography in this picture.  I had children with rather shaky hands helping me in taking the pictures.

With this fabric I made both girls a skirt and I made all three of us a pocket tee.  Last summer I bought two light blue t-shirts for the girls that I never used.  One is now to small for either girl and one fit Taylor perfectly, so I used it for this outfit.  A while back I bought a lime green t-shirt for Alyssa and I had yet to use it so I decided to use it for this outfit.  When I bought a bunch of t-shirts for myself I bought a green one which worked out perfect for this outfit.

My Outfit

SAL

Alyssa's Outfit

AKC

Taylor's Outfit

TAJ

Monogrammed Outfit Purple with Pink Polka Dots

A few weeks ago I did a lot of sewing one Saturday and in that sewing I made a lot of matching outfits with monogramming for the girls and myself.  Over the next few weeks I am going to feature these outfits on here and I will be offering some pocket tees on my Facebook page for sale from the fabric that is featured in each of these post so make sure you check it out because there is limited fabric and once its gone it may be gone forever.

Matching Monogrammed Outfits

My Outfit

Alyssa's Outfit

Taylor's Outfit

The first outfit the girls and I wore was the purple with pink polka dots.  I bought these tank tops for the girls months ago and I never used them.  When I saw this fabric I knew it would be perfect to make them matching skirts with monogrammed shirts.  I also bought a good many t-shirts for myself in different colors and I decided the pink one was the perfect color for this fabric to make myself a monogrammed tee.

SAL

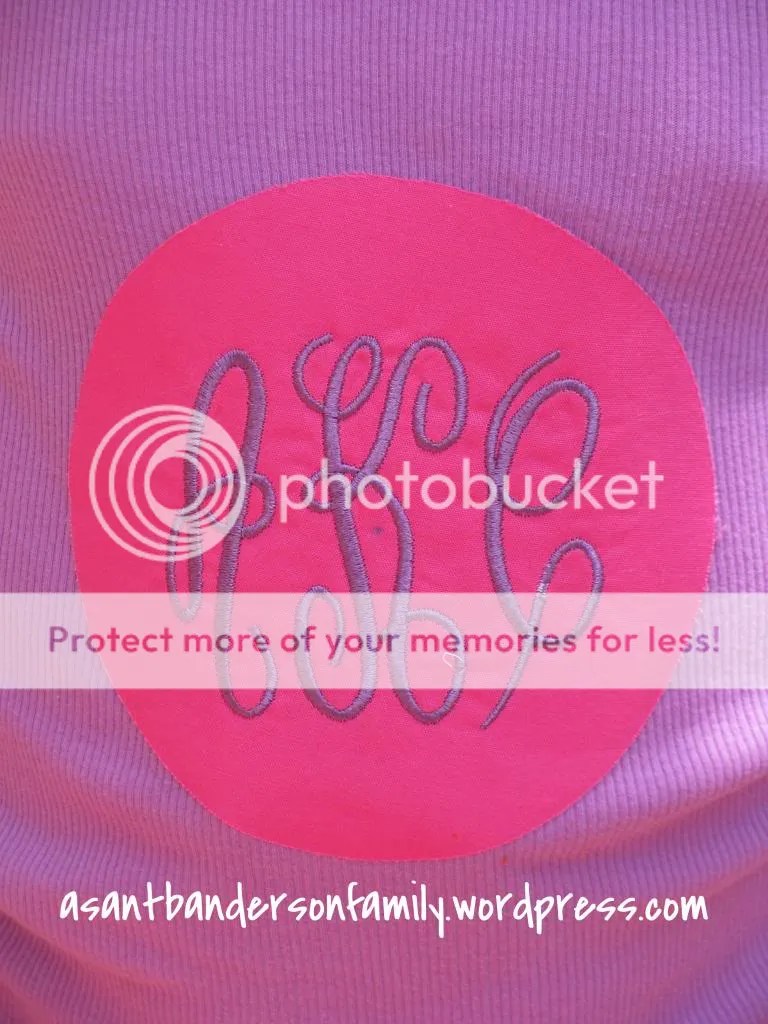
For the girls shirts I wasn’t sure about monogramming straight on the shirt and I didn’t think a pocket would look good so I decided to make a large monogrammed circle.  Luckily I had some pink in my scraps from a quilt I made years ago that was just the right color.

AKC

TAJ

Upcycled Play Kitchen

Upcycle Play Kitchen

In case you missed it the results for upcycle are up on SYTYC. I came in 3rd place with my upcycled play kitchen. I have known I wanted to do one of these for Bradley since I was pregnant with him. The kids had a plastic one when they were little and I still had some of the food toys (not as much as I thought), but the plastic one just did not hold up well with active toddlers so I knew I wanted a nicer one made of wood for Bradley, but I didn’t want to spend a fortune so why not make one. So I did just that.

Before & After Upcycle Play Kitchen

I found this entertainment center on Craig’s List for $10. They even gave us a TV with it but we have it to someone else. Adam helped me with this project a good bit. We started by taking off the backing and removing the drawers and shelf. I was hoping to use the shelf for the bottom since under the drawers was open, but it wasn’t quiet big enough. I bought a piece of wood for the bottom. Then we used a piece of wood we already had to divide the bottom in half. Then we cut the shelf to make the oven door.

Once we had all the wood cut Adam added some screws in it to tighten it up. It was pretty wobbly before we did this. Then he cut out the hole for the sink and the faucet. Then I puttied all the holes and deep scratches in the wood. Adam and I sanded the entire entertainment center till it was smooth.

I bought some new hardware for the refrigerator door and the oven door at Lowe’s. I actually made several trips to Lowe’s before I had the hardware worked out. Adam predrilled the holes for the oven door and refrigerator door. The new handle for the refrigerator required two holes instead of one.

Once we were done predrilling all the holes I put two coats of grey tented kilz on the entertainment center. The next part was the hardest. I decided I wanted the kitchen to match my other items in the sunroom, you can see them in my kid friendly decorating post. At first I thought I wanted to paint it black and use red, blue, green and yellow to accent the kitchen. But then I realized the accent colors wouldn’t cover over the black very well. Although I didn’t think about that till after we went all over town looking for Valspar black paint. The Lowe’s closest to our house was out of base c and had been for weeks. I had been in Lowe’s a few weeks before this project wanting to buy some black paint for another project so when I came back the lady was nice enough to look and find out how many each other Lowe’s in the area had of base c. Anyway, after deciding black was not the way to go I decided I was going to paint each section a different color. I started by painting the stove area with a coat of red. But while it was drying I decided that was tacky and was not what I wanted either. So I reprinted it with kilz and decided I’d use a base color of white and accent with red, blue, green and yellow. I had almost a full gallon of white from when we built Bradley’s bedroom and it was semi-gloss as well. Perfect!! I put two coats of white paint on the entertainment center. Then Adam used painters tape and taped off the oven door, the refrigerator door, the stripe across the top and the window. I had also bought a piece of wood for the backing but I didn’t attach it till after all the painting was done. Originally I wanted the window to have a black frame and plus sign so it would look like a window but then I decided that I’d probably mess up the paint so I simply went with the black window frame. I painted several coats of paint on the refrigerator door, the oven door, the stripe across the top and the window. If you remember when I bought these colors a while back I bought flat paint so instead of buying more paint I used them and when it was dry I put a coat of mod podge over it to give it the glossy look.

I also bought some wooden wheels from Hobby Lobby and I painted one red, one blue, one green and one yellow. I wanted them to spin like real knobs so I got some washers and nails to attach them. Not my best idea but it worked. We will probably figure out a better way to attach them later.

For the oven eyes, I used my Cricut to cut out some black circles. I cut out several sizes ranging from 3 to 6 inches. I believe I ended up using the 4 and 5 inch circles for the eyes. I wanted it to look as real as possible so I made two different sizes. I used mod podge to attach the card stock to the entertainment center.

I bought a metal dog bowl and faucet at Wal-Mart. Originally my plan was to buy a new faucet for our kitchen since it leaks and use the one in our kitchen for this project but they are expensive and it was out of my budget for this project so I went with a smaller cheaper one for the play kitchen. At first I put a bead of glue under the lip of the bowl and put it in the hole we cut, but slowly the glue was dripping and making a huge mess under the sink. We added a bead of white caulk around the top of the bowl and along the seams of the wood. Some of them had small gaps from the wobbliness of the entertainment center. I felt like this really helped give it a finished look. Then we simply attached the faucet with the pieces that came with it.

Once all the paint was dry we attached the oven door and refrigerator door. The oven door also has a magnet at the top to help hold it together when it closes. Then we attached the backing.

I wanted a curtain to hide under the sink but I wasn’t sure how I wanted to attach it. I had the idea of a dowel in my head but I wanted to be able to remove it too. I had these red hooks from when I was going to hang a dowel to hod ribbon, which I obviously never did, so I decided to use them to hang the curtain. I only had three and I needed four so back to Lowe’s we went (my kids were really good sports about all our trips to Lowe’s and Hobby Lobby). It’s been over a year since I bought the red hooks and I wasn’t able to find anymore red ones but I did find some white ones the same size. So I used two red ones for the curtain under the sink, two white ones for the curtain over the window and one red one for the pot holder.

Fabric to match this project was a pretty easy decision. Earlier this summer I made the kids all a summer tote and I wanted a color that had red, blue, green and yellow in it and wasn’t too girlie. In this case I wanted the same thing so we went to Hobby Lobby and got some more puzzle piece fabric. I measured my width of each opening and doubled it for the width of my fabric. For the length I measured my length then added a few inches to it for my length. When I was done making my curtains I had a good bit of fabric left so I decided to make a quilted pot holder. I did this with the same idea of putting a quilt together. When I bought the fabric I also bought some rainbow ribbon to match so I used the ribbon for piping. Have I mentioned that I did this at 2 am? Yes, I couldn’t sleep thinking about my project so instead of staying in the bed and risking waking Adam up I went in the sunroom to work on it and it was after 2 am that night before I got in the bed.

Then I needed something to store all the food in so we loaded up and went to Dollar Tree and looked for some baskets. I knew they usually carry a variety of baskets in multiple colors. I lucked up and they had one in each of my four colors in one style basket. I really wanted some that looked like the baskets at the grocery store but they only had those in three of my four colors but I went and head and grabbed them. Hopefully I’ll find a yellow one in there later. The kids helped me divide and organize the food in the baskets. They had already been organizing it based on food groups so we basically followed that same idea.

Now we have a really cute play kitchen. The big kids all love it and Bradley is getting more and more interested in it. I have some left over fabric so I am debating on making some place mats for the table. I know I want to buy some more kitchen toys but since I don’t have anywhere good to store them I am thinking about getting the bookcase at Hobby Lobby that matches the table and chairs. I want to buy some small appliances for the play kitchen. Also I saw some stuff that I like for when Bradley gets a big boy room (thinking way down the road) that uses the same colors so I could even move it in his room later.

Upcycle Play Kitchen

Welcome to Speech

Recently we had Bradley’s six month review with early intervention to redo his goals.  He had achieved his goals with eating but not with walking so we modified and kept those goals.  One of his biggest problems these days is communication.  He fusses all the time and we think if he could tell us what he wants he would be happier.  We set a few goals related to communication and scheduled a speech evaluation.

A few weeks ago we had his speech evaluation.  I was told that day that he defiantly had a delay and qualified for services.  We decided to start with one day a month and if he didn’t seem to be doing well enough that we would change to twice a month.  I thought once a month would at least make things easier for summer.

At his first speech appointment I received a copy of his evaluation.  He is five months behind in communication.  He is 15 months old but as far as communication he is at about a 10 month level.  We are working on some baby signs and hoping once he learns a few of them that it will help some of his fussiness.  Right now we are working on more, drink and all done.

We had already started drink when we were still receiving occupational therapy services so we are continuing to work on it.  Candice, the speech instructor, wanted him to work on more and then one day when we were working on more we added all done.  He doesn’t seem to be doing very well with it but hopefully he will continue to improve.

EI has become such a big part of our life.  It was sad to say good bye to Adria, but it was good to know Bradley was doing well enough that he no longer needed occupational therapy.

Saying Goodbye to Adria